The Qt 6 Book
Contribute!
Contribute!
  • Preface

    • Welcome!
    • Acknowledgements
    • Authors
  • Meet Qt

    • Qt and Qt Quick
    • Qt Building Blocks
    • Qt 6 Introduction
  • Getting Started

    • Quick Start
    • Installing Qt 6 SDK
    • Hello World
    • Application Types
    • Summary
  • Qt Creator IDE

    • Qt Creator IDE
    • The User Interface
    • Registering your Qt Kit
    • Managing Projects
    • Using the Editor
    • Locator
    • Debugging
    • Shortcuts
  • Quick Starter

    • Quick Starter
    • QML Syntax
    • Core Elements
    • Components
    • Simple Transformations
    • Positioning Elements
    • Layout Items
    • Input Elements
    • Advanced Techniques
  • Fluid Elements

    • Fluid Elements
    • Animations
    • States and Transitions
    • Advanced Techniques
  • QtQuick Controls

    • UI Controls
    • Introduction to Controls
    • An Image Viewer
    • Common Patterns
    • The Imagine Style
    • Summary
  • Model View

    • Model-View-Delegate
    • Concept
    • Basic Models
    • Dynamic Views
    • Delegate
    • Advanced Techniques
    • Summary
  • Canvas

    • Canvas Element
    • Convenience API
    • Gradients
    • Shadows
    • Images
    • Transformation
    • Composition Modes
    • Pixel Buffers
    • Canvas Paint
    • Porting from HTML5 Canvas
  • Shapes

    • Shapes
    • A Basic Shape
    • Building Paths
    • Filling Shapes
    • Animating Shapes
    • Summary
  • Effects

    • Effects in QML
    • Particle Concept
    • Simple Simulation
    • Particle Parameters
    • Directed Particles
    • Affecting Particles
    • Particle Groups
    • Particle Painters
    • Graphics Shaders
    • Shader Elements
    • Fragment Shaders
    • Wave Effect
    • Vertex Shader
    • Curtain Effect
    • Summary
  • Multimedia

    • Multimedia
    • Playing Media
    • Sound Effects
    • Video Streams
    • Capturing Images
    • Summary
  • Qt Quick 3D

    • Qt Quick 3D
    • The Basics
    • Working with Assets
    • Materials and Light
    • Animations
    • Mixing 2D and 3D Contents
    • Summary
  • Networking

    • Networking
    • Serving UI via HTTP
    • Templates
    • HTTP Requests
    • Local files
    • REST API
    • Authentication using OAuth
    • Web Sockets
    • Summary
  • Storage

    • Storage
    • Settings
    • Local Storage - SQL
  • Dynamic QML

    • Dynamic QML
    • Loading Components Dynamically
    • Creating and Destroying Objects
    • Tracking Dynamic Objects
    • Summary
  • Javascript

    • JavaScript
    • Browser/HTML vs Qt Quick/QML
    • JS Language
    • JS Objects
    • Creating a JS Console
  • Qt C++

    • Qt and C++
    • A Boilerplate Application
    • The QObject
    • Build Systems
    • Common Qt Classes
    • Models in C++
  • Extending QML

    • Extending QML with C++
    • Understanding the QML Run-time
    • Plugin Content
    • Creating the plugin
    • FileIO Implementation
    • Using FileIO
    • Summary
  • Qt for Python

    • Qt for Python
    • Introduction
    • Installing
    • Building an Application
    • Limitations
    • Summary
  • Qt for MCUs

    • Qt for MCUs
    • Setup
    • Hello World - for MCUs
    • Integrating with C++
    • Working with Models
    • Summary

Installing

Qt for Python is available through PyPA using pip under the name pyside6. In the example below we setup a venv environment in which we will install the latest version of Qt for Python:

mkdir qt-for-python
cd qt-for-python
python3 -m venv .
source bin/activate
(qt-for-python) $ python --version
Python 3.9.6

When the environment is setup, we continue to install pyside6 using pip:

(qt-for-python) $ pip install pyside6
Collecting pyside6
Downloading [ ... ] (60.7 MB)
Collecting shiboken6==6.1.2
Downloading [ ... ] (1.0 MB)
Installing collected packages: shiboken6, pyside6
Successfully installed pyside6-6.1.2 shiboken6-6.1.2

After the installation, we can test it by running a Hello World example from the interactive Python prompt:

(qt-for-python) $ python
Python 3.9.6 (default, Jun 28 2021, 06:20:32) 
[Clang 12.0.0 (clang-1200.0.32.29)] on darwin
Type "help", "copyright", "credits" or "license" for more information.
>>> from PySide6 import QtWidgets
>>> import sys
>>> app = QtWidgets.QApplication(sys.argv)
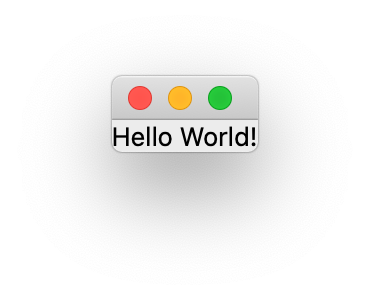
>>> widget = QtWidgets.QLabel("Hello World!")
>>> widget.show()
>>> app.exec()
0
>>>

The example results in a window such as the one shown below. To end the program, close the window.

Help us improve this page!
Last Updated: 11/26/25, 7:55 PM
Contributors: Fabrice SALVAIRE
Prev
Introduction
Next
Building an Application